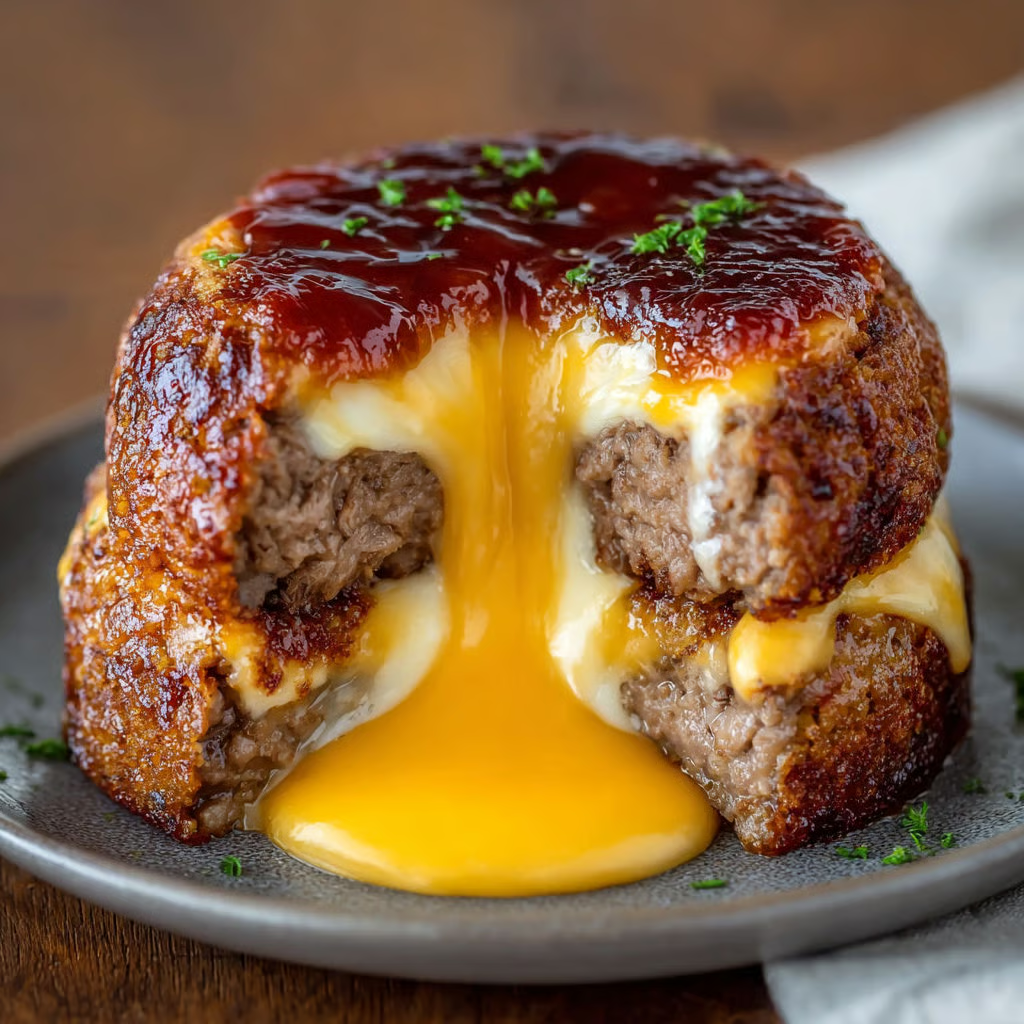
Bite into a satisfying twist on the classic cheeseburger. These thick, skillet-seared beef cakes are sealed around a chilled cheese center made from sharp cheddar, stretchy mozzarella, and silky cream cheese. One cut reveals an irresistibly melted middle that flows onto the plate. Rustic in spirit, bold in flavor, and easier to make than they look, these are built to impress at any shared table.
Why This Recipe Gets All the Attention
A short list of seasonings you likely already stock at home
A triple-cheese core that stays inside the patty until sliced
Great for prepping ahead and freezing before cooking
Delivers familiar burger comfort with a dramatic reveal
Ingredients
Beef Cakes
450 g 80/20 Ground Beef
1 tsp garlic powder
1 tsp onion powder
1 tsp paprika
Salt, to taste
Freshly cracked black pepper
Cheese Center
100 g grated cheddar
60 g grated mozzarella
30 g softened cream cheese
For Cooking & Serving
30 g unsalted butter (for searing)
Ranch, BBQ sauce, or ketchup for plating (optional)
Method
-
Chill the Cheese Core
Combine the cheeses and softened cream cheese until the mix is smooth and easy to shape. Portion into 2–3 tbsp balls and freeze for 15–20 minutes. This brief chill keeps the cheese in the center during cooking. -
Season the Beef
Place the ground beef in a bowl and sprinkle with garlic, onion, paprika, salt, and pepper. Combine gently until seasoned. Avoid heavy kneading—light hands keep the patties tender. -
Seal the Filling Inside
Split the beef into 6 equal portions. Press each into a thick round patty. Place a chilled cheese ball in the middle of one patty, top with another, and pinch all edges together until sealed. Repeat until all are assembled. -
Sear the Outside
Melt butter in an oven-safe skillet over medium-high heat. Sear each side for 2–3 minutes until golden with crisp edges forming. -
Finish in the Oven
Transfer the skillet into a 190°C (375°F) oven and bake 10–12 minutes. The beef should be cooked through while the cheese inside remains soft and molten. -
Rest & Cut
Let the beef cakes sit for several minutes before cutting. Brush tops with BBQ or ketchup glaze if you like. Slice once ready, allowing the cheese center to spill out slowly and cleanly.
Recipe Notes
Freezing the cheese balls ahead of time helps maintain the molten center
Press and seal edges completely so no filling escapes
Resting after baking improves structure for a neater cut
Storage & Make-Ahead
Let cooked patties cool before storing in a sealed container in the fridge for up to 3 days. Reheat in an oven or air fryer to bring back texture. Assembled, uncooked patties can be wrapped individually and frozen for 1 month—thaw overnight in the fridge before cooking.
Easy Swaps & Variations
No beef? Use turkey or chicken but add extra butter or oil since lean meats dry faster. Try Swiss, gouda, or pepper jack in the center for different flavor layers. You can also fold chopped crisp bacon or a spoon of Dijon into the cheese for extra depth.
Serving Ideas
Pair with crisp potato fries, sweet potato wedges, or a bright salad for contrast. These also work beautifully served on small buns, slider-style, with sauces for dipping at casual gatherings.
Origins & Inspiration
Cheese-stuffed burgers have appeared in diners and backyard grills across America and Europe, echoing the spirit of the Midwest’s Juicy Lucy burger, while this compact beef-cake style gives a dramatic lava-style reveal perfect for entertaining.
Common Questions
How to prevent leaks?
Chill cheese balls first and pinch beef edges closed completely.
Try other cheeses?
Use any melt-friendly cheese blend you enjoy.
Best sides?
Fries, salads, roasted or grilled vegetables all pair well.
Make them early?
Yes—assemble and freeze, thaw in the fridge before cooking.
Reheating tip?
Use an oven or air fryer to preserve texture.